

How to Setup a Linux, Nginx, uWSGI, Python, Django Server
This is a tutorial for setting up a Linux, Nginx, uWSGI, Python, Django server with a PostgreSQL database. This is the easy, straightforward approach to server setup and deployment. The intended audience is developers or teams who need to get an application or two running in production without too much hassle.
If you need to oversee multiple servers or you are handling a large number of applications, the limitations of the setup described here will start to show through. Here is an example of a much more complex deployment workflow that is more appropriate reading for dedicated DevOps people.
General server setup
I’m using Linode running Ubuntu 12.04 LTS, but you should be able to adapt this tutorial to other hosts and distros as needed.
Before getting started, take steps to update and secure the server. Security is beyond the scope of this article, but if you don’t know where to start, have a look at this tutorial.
Install uWSGI
Let’s get started by installing uWSGI. ssh into the server and
sudo apt-get install uwsgi uwsgi-plugin-pythonCreate a user to run uWSGI:
sudo useradd -c 'uwsgi user' -g nginx --system \
--no-create-home --disabled-login --disabled-password uwsgi
Create an upstart configuration file at /etc/init/uwsgi.conf which looks like this:
description "uWSGI"
start on runlevel [2345]
stop on runlevel [06]

respawn

exec uwsgi --master --processes 4 --die-on-term --uid uwsgi --gid nginx \
--socket /tmp/uwsgi.sock --chmod-socket 660 --vhost --logto /var/log/uwsgi.log \
--plugins python
Install Nginx
The version of Nginx provided in the official Ubuntu repository is a bit outdated, so we are going to use the latest stable package from the Nginx repository. If you are on Ubuntu, just follow the instructions below, but if you are on another distro or run into trouble, have a look at the official install guide.
First we add the key
wget http://nginx.org/keys/nginx_signing.key
sudo apt-key add nginx_signing.key
Then open up the /etc/apt/sources.list file and append the following:
deb http://nginx.org/packages/ubuntu/ precise nginx
deb-src http://nginx.org/packages/ubuntu/ precise nginx
If you aren’t using Ubuntu 12.04, change precise to the the codename for your Ubuntu version.
Then install Nginx with:
sudo apt-get install nginx
Nginx is already running. To verify, open your server’s ip address in a browser, and you should see a ‘Welcome to nginx!’ screen.
Nginx config
The webapp is going to live at /var/www/<app-name>/. Here is what the directory tree will look like when we finish:
/var/www/<app-name>/
    |-- env/                    The virtual env
    |-- project/                The Django project files
        |-- <apps>/
        |-- <project>/
            |-- wsgi.py
        |-- requirements.txt    Pip project dependency list
    |-- static/                 Static files to be served by nginx
So let’s setup that directory structure.
sudo mkdir /var/www/<app-name>
sudo mkdir /var/www/<app-name>/project
sudo mkdir /var/www/<app-name>/static
Now to setup the virtual environment for our application:
sudo apt-get install python-pip python-setuptools
pip install virtualenv
cd /var/www/<app-name>
virtualenv env
Now we need to fix some permissions so that uWSGI can read scripts and write the .pyc files:
sudo usermod -a -G nginx $USER
sudo chown -R $USER:nginx /var/www/<app-name>/
sudo chmod -R g+w /var/www/<app-name>/
Create the file /etc/nginx/conf.d/<app-name>.conf with these contents:
server {
    listen          80;
    server_name     $hostname;
    location /static {
        alias /var/www/<app-name>/static;
    }
    error_page   404              /404.html;
    error_page   500 502 503 504  /50x.html;
    location = /50x.html {
        root   /usr/share/nginx/html;
    }
    location / {
        include         uwsgi_params;
        uwsgi_pass unix:/tmp/uwsgi.sock;
        uwsgi_param UWSGI_PYHOME /var/www/<app-name>/env;
        uwsgi_param UWSGI_CHDIR /var/www/<app-name>/project;
        uwsgi_param UWSGI_MODULE <project-name>.wsgi:application;
    }
}
Don’t forget to swap out <app-name> for the name of your app in lines 5, 15, and 16, and use your own project name on line 17.
In this configuration, nginx will serve files in the static directory, but pass off everything else to uWSGI.
Now let’s move the default config out of the way, so the new config can take it’s place.
cd /etc/nginx/conf.d
sudo mv default.conf default.conf.bak
OK let’s start things up:
sudo service uwsgi restart
sudo service nginx restart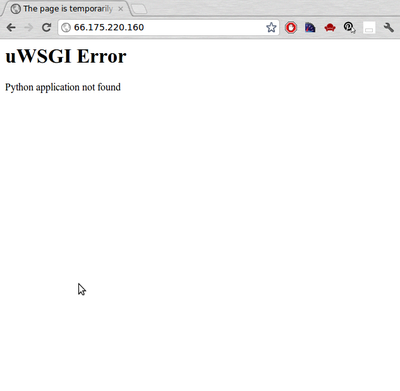
If everything has be setup properly so far, navigating to the IP address should now show a uWSGI error.
Install the Django app
Now install your Django app into /var/www/app-name/project/ For now, just get a clean copy out of source control and scp it to the server, or grab it directly from source control while on the server. Later, you should setup a deployment script to automate this, but for now let’s just get the app running.
In this case, I am keeping my code in a Bitbucket git repository, and I want to pull the code directly from Bitbucket to the server. So on the Bitbucket site, I create a new user with read only permissions on the code repository. Then I create a new ssh key on the server
ssh-keygen -t rsa -C "<email address>"and add it to the Bitbucket account for the new user by uploading the id_rsa.pub file.
Now to install git
sudo apt-get install gitAnd pulling the source code out of the repository now looks like this:
cd /var/www/<app-name>/project/
git archive --format=tar --remote=ssh://git@bitbucket.org/<username>/<repo name>.git master | tar -xf -
Then fix up any permissions issues again:
sudo chown -R $USER:nginx /var/www/<app-name>/
sudo chmod -R g+w /var/www/<app-name>/
Install any packages required by your app or it’s dependencies. For example, psycopg2 and lxml respectively depend on the following packages:
sudo apt-get install python-dev libpq-dev
sudo apt-get install libxml2-dev libxslt-dev
Now install the project requirements into the virtual environment:
source /var/www/<app-name>/env/bin/activate
pip install -r /var/www/<app-name>/project/requirements.txt
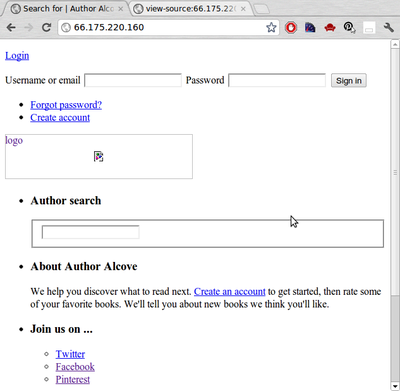
deactivateOK so now that the Django code files are on the server and the dependencies are satisfied, navigating to the IP address in your browser should show your app. Static files aren’t being served yet and the database isn’t installed, but we can see some progress.
If you haven’t got this far, the log files for upstart, nginx, and uwsgi are a good place to start troubleshooting.
In order to have Nginx serve the static files, they need to be collected to /var/www/<app-name>/static. In settings.py point your STATIC_ROOT to that static directory, then verify that STATIC_URL and STATICFILES_DIRS are properly set up. Get any changes from the repository, then:
source /var/www/<app-name>/env/bin/activate
cd /var/www/<app-name>/project/
python manage.py collectstatic
Test it out in your browser and you should now see css, javascript, and image files being loaded. However, without the database, your app probably isn’t doing much of anything. So let’s fix that.
Installing PostgreSQL
sudo apt-get install postgresql postgresql-contribThen setup passwords:
sudo passwd postgres
su postgres
createuser django --pwprompt
psql create database <dbname> owner django
exit
sudo /etc/init.d/postgresql restart
Now initialize the database:
cd /var/www/<app-name>
source env/bin/activate
cd project
./manage.py syncdb
If you use south for database migrations, run those now.
./manage.py migrate <name>Your Django app should now be up and running.
Closing remarks
Now that the server is ready, setup one click deploys to speed up your code – test – deploy cycle.
Support the creation of tutorials like this one by using the following links to purchase Linode hosting or shop at Amazon.
A big thanks to Conrad Kramer, Collective Disorder, and Simon Westphahl for guiding the creation of this tutorial.
Discussion on
How to Setup a Linux, Nginx, uWSGI, Python, Django Server
by Jess Johnson in Tips & Tutorials
14 Comments
11:51 am UTC, 2012-07-26
7:15 pm UTC, 2012-07-26
3:23 pm UTC, 2012-08-13
5:39 pm UTC, 2012-08-13
12:22 am UTC, 2012-10-06
5:20 pm UTC, 2012-10-06
7:08 am UTC, 2012-10-07
5:35 am UTC, 2012-10-08
2:14 pm UTC, 2012-10-08
9:15 am UTC, 2012-10-29
10:26 am UTC, 2012-10-29
10:38 pm UTC, 2012-11-27
10:56 pm UTC, 2012-11-27
3:39 pm UTC, 2014-11-19Leave a reply